
What is a policy list? In Logwise, you can create and customize lists to manage company policy related matters. For example, you may want employees to confirm that they have read and understood the insider policy and that they have trading restrictions during certain periods. Collect and keep track of annual approvals in regards to certain policys or similar corporate governance related processes.
1. How to create a policy list?
Go to the menu Policy list > Manage policy lists and then click the Add new policy list button
Give the new list a name and click "Create"
View all your lists through the overview page and click on the list you want to work on.
2. Add new member confirmations
What is a member confirmation?
A member confirmation is a mechanism used to collect approvals or data related to specific company policies. For example, you might use it to obtain consent for the financial information recipient insider policy, manage annual corporate governance processes, or agree to display director shareholdings on your company website. Additionally, member confirmations can be customized as text inputs to collect specific information, such as data on PDMRs’ holdings.
On the list, either click the 3-dots menu at the top right corner and select "Manage confirmations" or on the "Manage confirmations" on the list
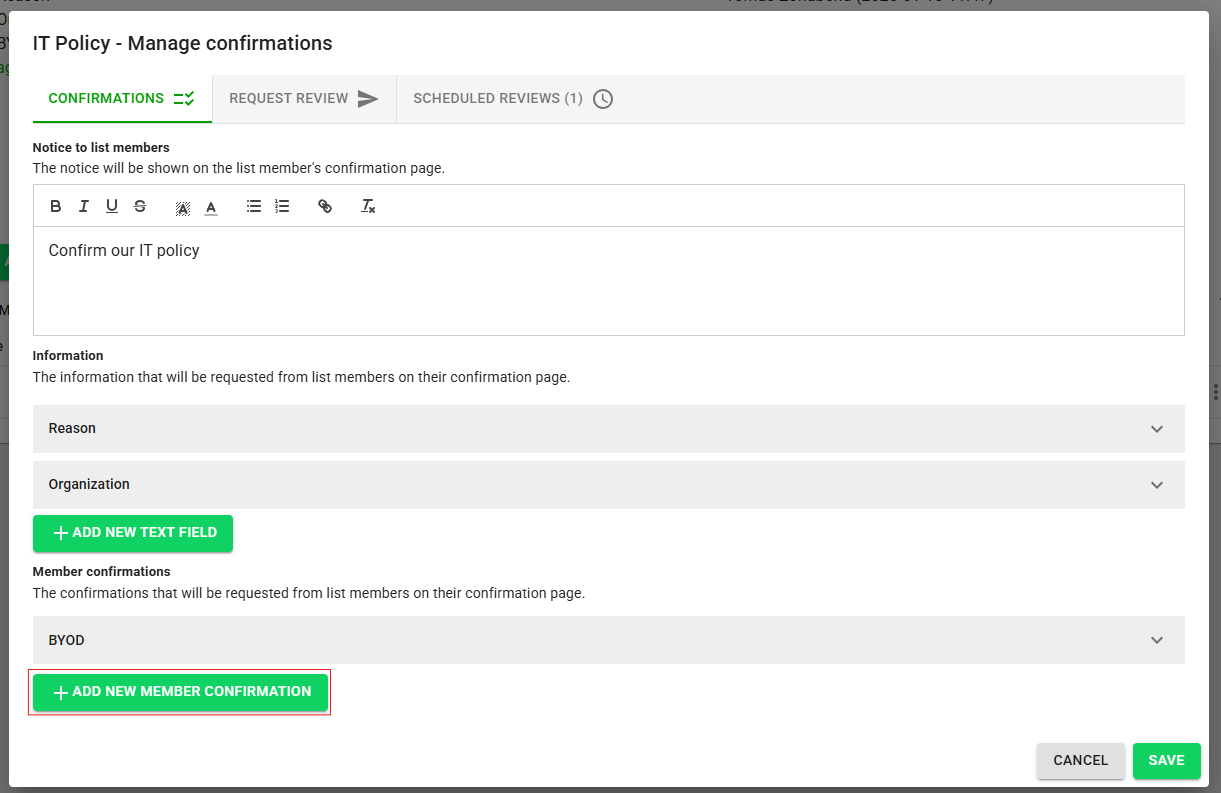
This opens the dialogue where you have the possibility set the "Notice" text that will be displayed on the members confirmation page. as confirmations as well as adding new member confirmations.
To add a new member confirmation click the "Add new member confirmation"
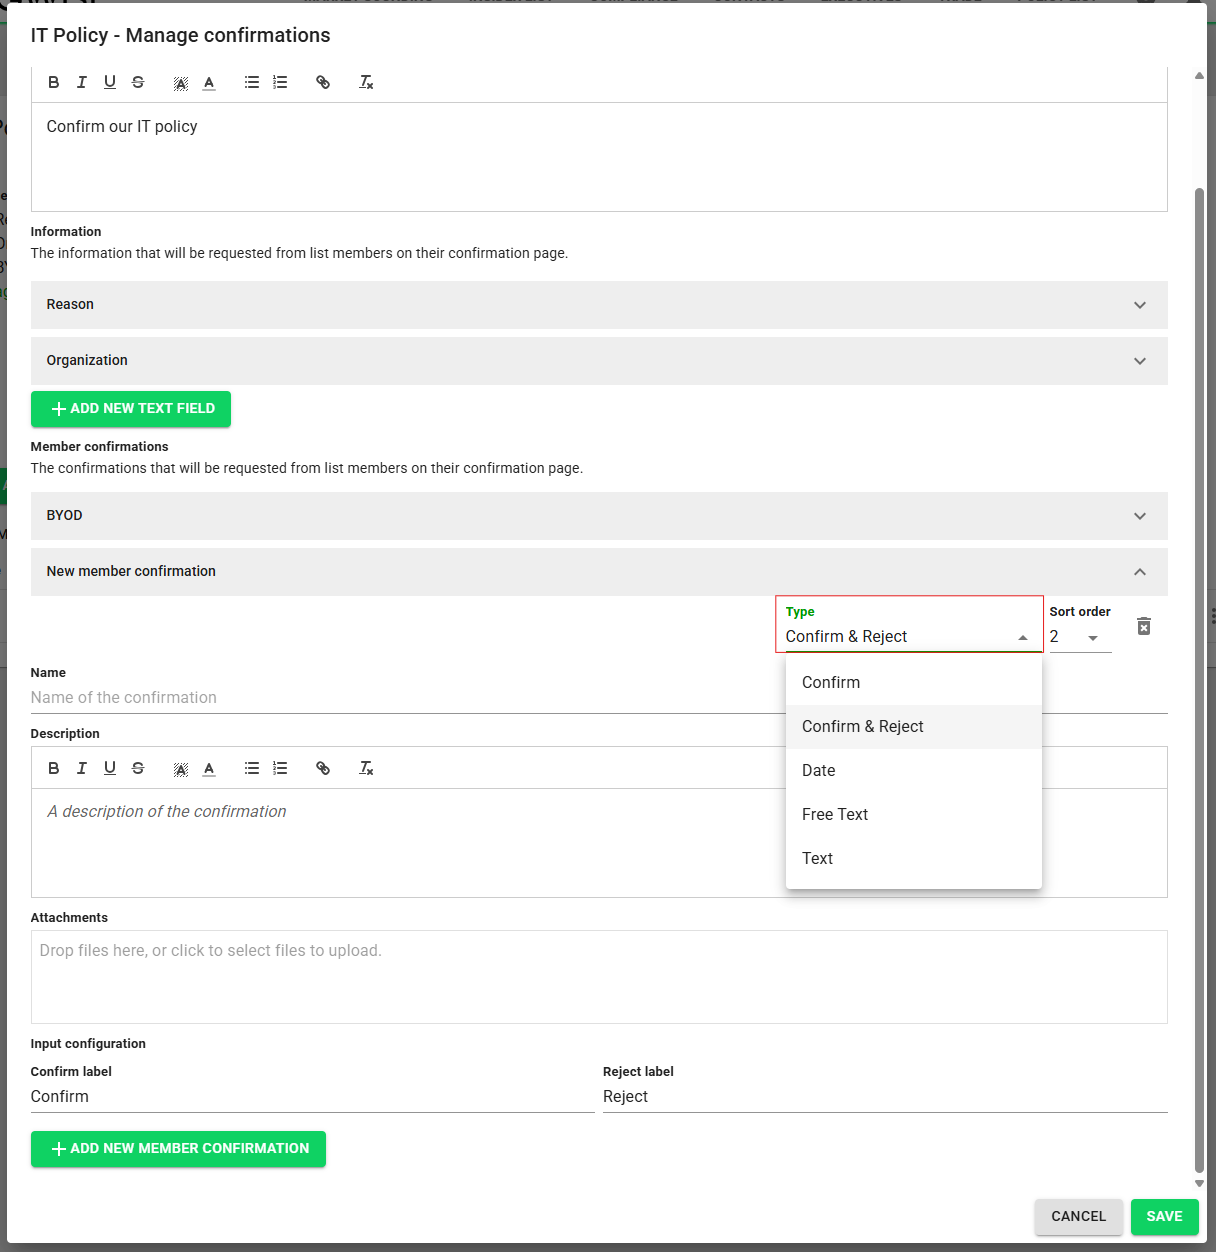
The Member Confirmations feature lets you request approvals or gather specific data from list members on their confirmation page. When setting up a member confirmation, you can customize several key elements to align with your company policies:
-
Type:
Choose the nature of the confirmation. For example, select Confirm & Reject to set up a custom approval process where members can either confirm or reject the request.
-
Sort Order:
Specify the display sequence for the confirmations, ensuring that they appear in the intended order on the confirmation page.
-
Name and Description:
Use these fields to clearly label and explain each confirmation. For instance, you might name one confirmation "BYOD" with a description such as "Bring your own device policy" to indicate its purpose.
-
Attachments:
Add supporting documents by dragging files into the designated area or clicking to select files. This ensures that any relevant materials are easily accessible to the member.
-
Input Configuration:
Customize the button labels used for the confirmation process. For example, you can set the Confirm label to "Confirm" and the Reject label to "Reject" to match your company’s terminology.
Using these options, you can effectively tailor each member confirmation to collect the specific approvals or data required for your policy lists.
To change description or set up any details regarding the list. Use the "Edit list" option under the three dot menu.
Provide the information requested. Check the box "Use closed period notification" if you want list members to automatically receive email notifications about upcoming closed periods based on the reporting dates. (Added through menu Executives > reporting periods). Click "Save"
3. Add list members
Click the green button "Add new list member(s)".
Add members using the top field "Persons". Start typing and existing persons and groups will be displayed (
click here for instructions how to create groups of persons). To add a new person start typing until the option "
add [name] as a new contact" comes up and follow the instructions. Select if you want to send a notification to the selected persons or not. Notifications can also be sent at a later stage. Review the message and click add (the standard message can be changed using the 3-dots menu at the top left corner).
The person(s) added to the list will, when notified, receive an email with a link to their personal Logwise site where they are asked to confirm. There can be multiple obligations on a single list and list members will, in such case, then be guided through the different obligations as seen below.
The administrator can track the progress of each list member through the list overview page.
There are options to send additional messages to list members. For individual messages click the 3-dots to the right of the list member you want to notify. For bulk message to the whole or part of the list, use the 3-dots at the top right corner and select "Send notification to the list". You can view all list notifications sent to the list members by clicking "View notifications", as seen below.
Additional options are available through the 3-dots menu to the right of each list member.
Standard email templates and other list related settings can be view through the top right 3-dots menu.
Related articles: